
How Custom Hat Pins Are Made – Complete Process Explained
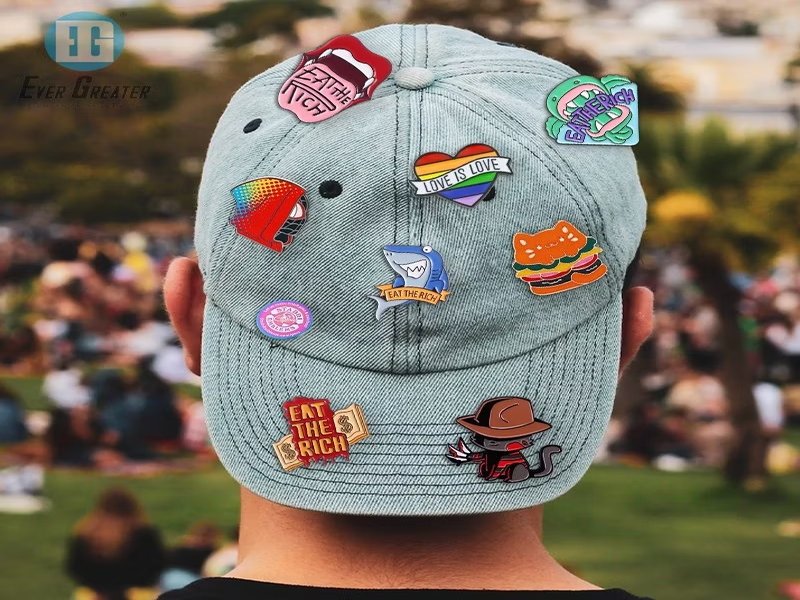
A hat pin looks like a small, straightforward product. Send a design, get a pin back. In practice, several choices happen in between that shape how the finished piece looks and how long it actually lasts once it’s on a cap.
Most of that attention goes to the design itself: the artwork, the colors, the finish. One detail usually gets skipped entirely, and it has nothing to do with how the pin looks. It’s the part that decides whether the pin stays put through months of daily wear or comes loose within a few weeks.
Turning a Sketch Into a Production-Ready File
A pin starts as a drawing, but a factory can’t stamp a drawing. It needs a file built to exact scale, exact color codes, and specific spacing rules before it goes anywhere near a die.
· Scale and Proportion
Draw or digitize the design at the actual size of the finished pin, not a larger version scaled down later. What looks fine on a screen at six inches can lose its detail once it’s shrunk to an inch and stamped into metal.
· Vector Conversion
The sketch gets rebuilt as a vector file, usually .ai, .eps, or a high-resolution .pdf. Vector lines stay sharp at any size, which matters once the design moves from a screen to a die engraver.
· Color Matching
Each color in the design gets assigned an exact Pantone code. This is the step that keeps a batch of Hat Pins Canada orders consistent, since screen colors shift from one monitor to the next but a Pantone code doesn’t.
· Spacing and Bleed
Fine text and thin lines need room to survive the stamping process. A small bleed area, usually around 1/8 inch, keeps detail from getting crushed or lost near the edge of the pin.
Soft Enamel or Hard Enamel: What’s the Real Difference
The two finishes come from different processes, and that difference shows up the moment you touch the pin. One keeps a raised texture you can feel under your fingers. The other gets polished down until the surface is completely flat.
| Soft Enamel | Hard Enamel | |
| Finish | Raised metal lines, textured surface | Polished flat, smooth surface |
| Color | Air-dried, brighter and more vivid | Heat-cured, slightly muted tone |
| Best for | Short runs, bold branding | Daily wear, long-term durability |
For most personalised enamel pins Canada buyers order for hats, hard enamel holds up better simply because a hat gets handled more than a lapel pin ever does. Soft enamel still makes sense for a one-off design or an event pin that won’t see months of daily wear.
How a Metal Die Stamps Your Design
Once the file is approved, it leaves the design stage completely. What happens next has nothing to do with color or layout. It’s a mechanical process, and it decides how crisp the final pin actually looks.
Cutting the Die
A hardened steel die gets engraved as a mirror image of the approved design. Every line, edge, and letter is cut into the die in reverse, since that’s what presses the shape into the metal correctly.
Stamping the Metal
A mechanical press drives the die into a sheet of brass, iron, or zinc alloy with enough force to punch the design straight through. This one stamp creates both the raised lines and the recessed areas that color gets added to later.
Cleaning the Piece
Each stamped piece comes off the press with rough edges. It gets cleaned and deburred before it moves on to plating, so the metal lines stay sharp instead of jagged once the enamel goes in.
Which Backing Actually Holds on a Hat
A pin’s backing rarely gets a second thought during design, but it’s the part that decides whether the pin stays on the hat or ends up lost after a few wears. Hats get handled far more than a jacket lapel ever does.
Rubber Clutch
Easiest to put on and take off. Holds fine for occasional wear but loosens with repeated handling.
Butterfly Clutch
The standard choice on most pins. Moderate hold, spring-loaded wings, works fine for everyday use.
Locking Clutch
The one that matters for Hat Pins Canada orders specifically. A hat gets grabbed, stuffed in a bag, and worn daily in a way a lapel pin never does. A locking clutch won’t release unless it’s pulled straight back on purpose.
For a pin that’s actually going on a hat someone wears often, the locking clutch is the right call. The other two are fine for occasional or formal wear, but they’re not built for that kind of daily handling.
Plating and Packaging: The Final Steps
Color and shape are locked in by this stage. What’s left is the metal finish on top and how the pin gets handed over once it’s done.
Plating Options
- Gold plating: bright at first, shows fingerprint marks and light scratching sooner than other finishes
- Silver plating: clean and neutral, holds up well but can dull slightly with regular handling
- Black nickel: hides small scratches better than lighter finishes, stays sharp-looking longer
- Antique copper: already has a worn, muted look built in, so daily wear barely changes its appearance
Final Packaging
Finished pins get mounted onto a backing card and sealed in a polybag or protective sleeve before they ship. It’s a small step, but it’s what keeps the pin from getting scratched or the backing knocked loose in transit.
How Long the Whole Process Takes
Design and manufacturing decisions aside, timing is usually the first thing people want to know. It breaks down into a few clear stages rather than one long wait.
Proof and Revisions
A digital proof usually comes back within a couple of days. Most revision rounds add another day or two, depending on how many changes get requested.
Production Time
Once the proof is approved, actual manufacturing for personalised enamel pins Canada orders typically runs one to two weeks, depending on order size and finish type.
Shipping
Domestic shipping within Canada usually adds a few more days on top of production. Rush options exist with most manufacturers if a deadline is tight, though they come at a higher cost.
Common Mistakes to Avoid
Most delays trace back to a handful of avoidable issues, not manufacturing problems. Catching these before submitting a design saves a round trip.
- Overcrowded artwork: fine text and tiny details look fine on a screen but get lost once the design shrinks to actual pin size
- Skipping the proof review: changes are easy before production starts and difficult or costly once it’s underway
- Wrong backing choice: a rubber clutch on a hat that’s worn daily works for a week, not a year
- Low-resolution source files: a blurry logo or sketch scan makes it harder for the die engraver to cut clean lines
Queries That Trouble Most People About Hat Pins
1. How much does it cost to have custom pins made?
Pricing depends mostly on order size, since most of the cost comes from creating the metal die upfront. Small batches under 100 pins run higher per piece because that setup cost gets spread across fewer units. Larger orders bring the per-pin price down significantly, and reordering the same design later usually skips the die fee entirely.
2. How big should a hat pin be?
Most hat pins fall between 1 inch and 1.25 inches, which holds detail well without overwhelming the cap. Smaller sizes work for simple logos or initials, while anything above 1.5 inches is better suited to detailed artwork with multiple colors.
3. Is there a minimum order for custom pins?
Minimums vary by manufacturer, but very small orders, like 10 or 20 pins, usually cost more per piece because the die fee doesn’t get spread out. Ordering closer to 100 pins is typically the point where per-unit pricing starts to make sense.
4. What’s the difference between soft enamel and hard enamel?
Soft enamel keeps the raised metal lines and a textured feel, with color that’s air-dried rather than baked. Hard enamel gets polished flat and heat-cured, giving it a smoother finish and better resistance to scratching over time.
5. How can I create my own custom pins?
The process starts with a design file, either an original sketch or a vector file, submitted to a manufacturer. From there, a digital proof gets reviewed and approved, a metal die is cut, and the design moves into stamping, enamel fill, and plating before it ships.
Wrapping Up
Most of the process, from the sketch to the die stamp to the enamel fill, is handled by the manufacturer. The one decision that’s actually in your hands, and the one that matters most once the pin is out in the world, is the backing.
Get the finish right and get the colors right, but if the backing doesn’t match how the pin will actually be worn, none of that holds up for long. A locking clutch on a hat pin costs almost nothing extra and saves the pin from getting lost within the first few weeks. That’s the detail worth getting right before the order goes in.

I am a professional content writer at EnamelPin.ca, specializing in custom enamel pins, lapel pins, baseball pins, hat pins, and challenge coins for businesses, organizations, artists, and collectors across Canada. Through my articles, I share practical insights on pin design, materials, finishes, plating options, color selection, manufacturing processes, and branding strategies. My goal is to help readers make informed decisions, transform creative ideas into premium custom products, and understand the value of high-quality enamel pins for branding, recognition, and promotional success.